I’ve been hacking a fair bit on Visual Studio Mobile Center lately. The feature set is iterating pretty fast and recently the introduction of the ability to link Mobile Center to VSTS was added. Along with that, a couple of build tasks appeared in the vsts-tasks Github repository:
These new tasks enabled VSTS build or release definitions to trigger tests and upload build outputs for distribution through Mobile Center.
Since Mobile Center has been built API-first, I started wondering if I could make my own build task to actually trigger a build. Seems it isn’t too difficult.

I first started with an awesome post from Mitch Meunster where he used a Zamboni build tasks to upload builds to Mobile Center. If you want to learn how to configure Mobile Center and hack against the API then check it out.
With that knowledge under my belt I’ve written a build task and posted the code on GitHub. Let’s run through what I had to do to build the task and what you have to do in order to use it…
TLDR: You can either read the whole thing (which I recommend) or jump to the build/use sections:
Let’s have closer look…
How did I build it?
First step was to hit up Donovan Brown’s blog on creating Node.js build tasks. In this post Donovan shows how to create the basic scaffolding of the build tasks and even unit test them with code coverage.
I followed Donovan’s instructions and installed all of the required dependencies. I then used tfx-cli to create the task shell. Once this was in place I added the required parameters I needed for the build task to the task.json:
This file contains bidirectional Unicode text that may be interpreted or compiled differently than what appears below. To review, open the file in an editor that reveals hidden Unicode characters.
Learn more about bidirectional Unicode characters
| "inputs": [ | |
| { | |
| "name": "serverEndpoint", | |
| "type": "connectedService:vsmobilecenter", | |
| "label": "Mobile Center Connection", | |
| "defaultValue": "", | |
| "required": true, | |
| "helpMarkDown": "Select the service endpoint for your Visual Studio Mobile Center connection. To create one, click the Manage link and create a new service endpoint." | |
| }, | |
| { | |
| "name": "appSlug", | |
| "type": "string", | |
| "label": "App Slug", | |
| "defaultValue": "", | |
| "required": true, | |
| "helpMarkDown": "The app slug is in the format of **{username}/{app_identifier}**. To locate **{username}** and **{app_identifier}** for an app, click on its name from https://mobile.azure.com/apps, and the resulting URL is in the format of [https://mobile.azure.com/users/<b>{username}</b>/apps/<b>{app_identifier}</b>](https://mobile.azure.com/users/{username}/apps/{app_identifier})" | |
| } | |
| ], |
Mobile Center Connection: The service endpoint for Mobile Center including the API token for the subscription.
App Slug: This is where you enter the specific info that Identifies who you are and what app you want to push for. You will find this info in the URL of your app in Mobile Center.
The Mobile Center Connection allows you to configure a proper service connection in a similar way to Azure and then reuse this connection in several different build tasks. The connection details can be retrieved in Node.JS using code like so:
This file contains bidirectional Unicode text that may be interpreted or compiled differently than what appears below. To review, open the file in an editor that reveals hidden Unicode characters.
Learn more about bidirectional Unicode characters
| /* | |
| * Retrieves the details from the service endpoint defined for Mobile Center in VSTS | |
| */ | |
| function getMobileCenterEndpointDetails(endpointInputFieldName) { | |
| 'use strict'; | |
| var errorMessage = "Can't decode endpoint."; | |
| var endpoint = tl.getInput(endpointInputFieldName, true); | |
| console.log(`Endpoint: ${endpoint}`); | |
| if (!endpoint) { | |
| throw new Error(errorMessage); | |
| } | |
| let url = tl.getEndpointUrl(endpoint, false); | |
| console.log(`URL: ${url}`); | |
| let apiServer = url.substr(0, url.lastIndexOf('/')); | |
| console.log(`API Server: ${apiServer}`); | |
| let apiVersion = url.substr(url.lastIndexOf('/') + 1); | |
| console.log(`API Version: ${apiVersion}`); | |
| var authToken = tl.getEndpointAuthorizationParameter(endpoint, 'apitoken', false); | |
| if (!authToken) | |
| { | |
| console.log("NO AUTHTOKEN"); | |
| } | |
| return { | |
| apiServer: apiServer, | |
| apiVersion: apiVersion, | |
| authToken: authToken | |
| }; | |
| } |
In order to kick off a build and retrieve the output I needed to hit a few methods of the Mobile Center API.

First I call a POST to start a build and retrieve an identifier that I can use to retrieve the status of the build.

I then loop repeatedly and check for the status, waiting for the build to complete.

Once the build is complete I download the output and save it to the current working directory.
In order to make the REST calls I use request-promise as I like the more structured fashion of working with promises. The code looks like this:
This file contains bidirectional Unicode text that may be interpreted or compiled differently than what appears below. To review, open the file in an editor that reveals hidden Unicode characters.
Learn more about bidirectional Unicode characters
| // Construct build definition Url | |
| var buildDefinitionUrl = `${mobileCenterBaseUrl}/branches/master/builds`; | |
| var options = { | |
| url: buildDefinitionUrl, | |
| method: 'POST', | |
| headers: { | |
| "X-API-Token": apiToken, | |
| "Accept": "application/json", | |
| "Content-Type": "application/json" | |
| } | |
| }; | |
| request(options) | |
| .then(function (body) { | |
| // Parse the response so we can get the id of the new version | |
| var buildDefinitionResponse = JSON.parse(body); | |
| var buildId = buildDefinitionResponse.id; | |
| return buildId; | |
| }) | |
| .then(function (buildId) { | |
| util.debug("Starting build for Build Id: {0}", buildId); | |
| return waitForCompletion(buildId); | |
| }) | |
| .then(function (buildId) { | |
| util.debug("Build is complete. Retrieving built output…"); | |
| return downloadOutput(buildId); | |
| }); |
Looking into the waiting for completion code we use promises to delay for a wait amount and recursively call the wait method until the build is complete:
This file contains bidirectional Unicode text that may be interpreted or compiled differently than what appears below. To review, open the file in an editor that reveals hidden Unicode characters.
Learn more about bidirectional Unicode characters
| function waitForCompletion(buildId) { | |
| return Q.delay(waitTime * 1000) | |
| .then(function () { | |
| return checkForCompletion(buildId) | |
| }) | |
| .then(function (finished) { | |
| return finished === true ? buildId : waitForCompletion(buildId); | |
| }); | |
| } | |
| function checkForCompletion(buildId) { | |
| util.debug("Getting build detail for Build Id: {0}", buildId); | |
| // Construct build definition Url | |
| var buildDetailUrl = `${mobileCenterBaseUrl}/builds/${buildId}`; | |
| var options = { | |
| url: buildDetailUrl, | |
| headers: { | |
| "X-API-Token": apiToken, | |
| "Accept": "application/json", | |
| "Content-Type": "application/json" | |
| } | |
| }; | |
| return request(options) | |
| .then(function (body) { | |
| // Parse the response so we can get the build detail | |
| var buildDetail = JSON.parse(body); | |
| util.debug("Current build status: {0}", buildDetail.status); | |
| return (buildDetail.status === "completed"); | |
| }); | |
| } |
Once we’re complete we simply download the build output and save it to the working directory:
This file contains bidirectional Unicode text that may be interpreted or compiled differently than what appears below. To review, open the file in an editor that reveals hidden Unicode characters.
Learn more about bidirectional Unicode characters
| function downloadOutput(buildId) { | |
| util.debug("Getting build output for Build Id: {0}", buildId); | |
| // Construct build output Url | |
| var buildOutputUrl = `${mobileCenterBaseUrl}/builds/${buildId}/downloads/build`; | |
| var options = { | |
| url: buildOutputUrl, | |
| headers: { | |
| "X-API-Token": apiToken, | |
| "Accept": "application/json", | |
| "Content-Type": "application/json" | |
| } | |
| }; | |
| return request(options) | |
| .then(function (body) { | |
| // Parse the response so we can get the build detail | |
| var buildOutputDetail = JSON.parse(body); | |
| return (buildOutputDetail.uri); | |
| }).then(function (uri) { | |
| var file = fs.createWriteStream(MobileCenterBuildArtifacts); | |
| var downloadRequest = request(uri).pipe(file); | |
| downloadRequest.on('error', function (err) { util.debug("Error downloading build output: {0}", err); }); | |
| downloadRequest.on('finish', function () { file.close(function () { util.debug("Download complete: {0}", MobileCenterBuildArtifacts); }) }); | |
| }); | |
| } |
This does everything I want to do in order to retrieve the build output but next I wanted to put together some continuous integration for the actual build task and get some unit testing / code coverage in place. Enter VSTS.

My goal was to configure a build pipeline to show code coverage and support my lofty goal for 100% coverage. In order to do that I used instanbul as discussed in Donovan Brown’s post and was able to execute that locally. That produces a beautiful html based report to show coverage.


I also wanted to see the coverage in the VSTS build pipeline so I put another script in the package.json to allow the production of a Cobertura formatted coverage results that VSTS understands.
This file contains bidirectional Unicode text that may be interpreted or compiled differently than what appears below. To review, open the file in an editor that reveals hidden Unicode characters.
Learn more about bidirectional Unicode characters
| "scripts": { | |
| "test": "istanbul cover node_modules/mocha/bin/_mocha — -R list", | |
| "coverage": "istanbul cover –report cobertura node_modules/mocha/bin/_mocha — -R list" | |
| }, |
With that in place I could upload the results using the native VSTS task and show the results in the build output.
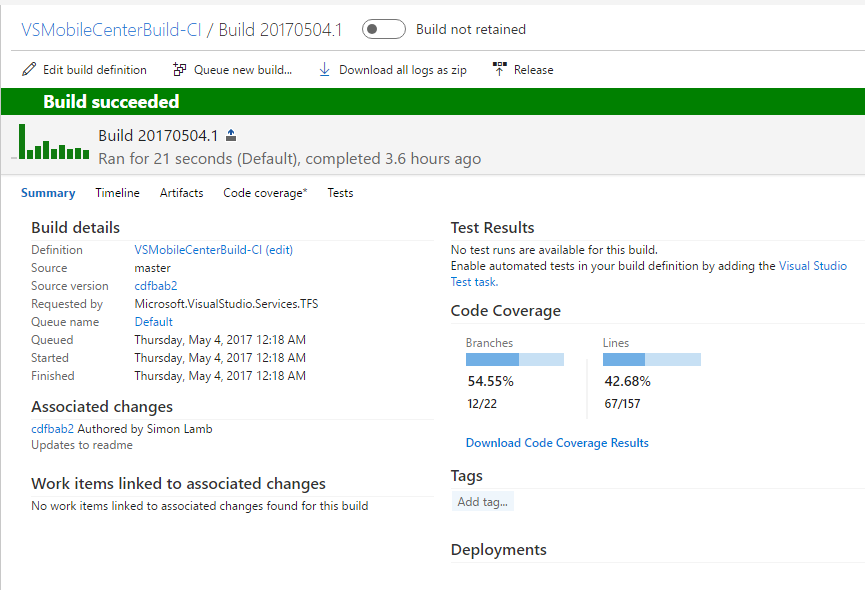
100% code coverage here we come!!!
How do you use it?
First we need to grab the build task code from my Github and upload it to VSTS. Clone the repository and open a console.
If tfx-cli isn’t installed then do that first:
npm install -g tfx-cli
Upload the task to VSTS:
tfx build tasks upload
You will need to provide a Personal Access Token and the address of your VSTS instance to do this. Once you’ve done this you can add it to a new build definition like so:

The first step requires the configuration of a service endpoint for Mobile Center. Configure it with your API key created in Mobile Center.

We need to configure the mobile center build step with the service endpoint and appslug:

The output of the build will downloaded into the workspace to a file called mobile-center-artifacts.zip. This I copied to the staging location so I could publish it as an artifact of the build.

From there the native publish task could attach the build output against a build in VSTS and you have the potential to do anything with it.

